As an avid hiker myself, I know how important it is to be prepared for every situation, especially when it comes to foot care. In my experience, blisters are not only painful, they can quickly turn a leisurely hike into a miserable experience for the unprepared. Let’s dive into proven strategies to keep your feet comfortable and blister-free on your next hiking adventure.
To avoid blisters while hiking, ensure your shoes fit well, break them in before hiking, and wear moisture-wicking socks. Keep your feet dry by changing socks frequently, apply foot lubricants or powders, and properly lace your boots. Be mindful of hot spots or discomfort and address them promptly to prevent blisters from forming.
What Causes Blisters to Form?
Understanding the root cause of blisters is key to their prevention. Blisters form when the outermost layer of your skin separates from the layers beneath, creating a small pocket. Fluid fills this pocket, eventually forming a blister. This fluid-filled sac is your body’s response to injury, acting as a cushion to protect the affected area from further harm. There are three primary causes of blisters during hiking:
- Fiction: Rubbing or chafing from shoes, socks, or debris
- Pressure: Continuous pressure on a particular area of the foot
- Moisture: Damp conditions caused by sweat or external factors, such as rain
In the context of hiking, specific actions you take and aspects of your gear can exacerbate these conditions, increasing the risk of blisters.
How Can You Prepare Your Feet for Hiking?
Proper preparation before hiking is essential to reducing the risk of blisters. It involves several steps, from choosing the right footwear to ensuring your feet are ready for the trail. Here are important steps to get your feet hike-ready:
#1 Tip: Select the Right Hiking Footwear
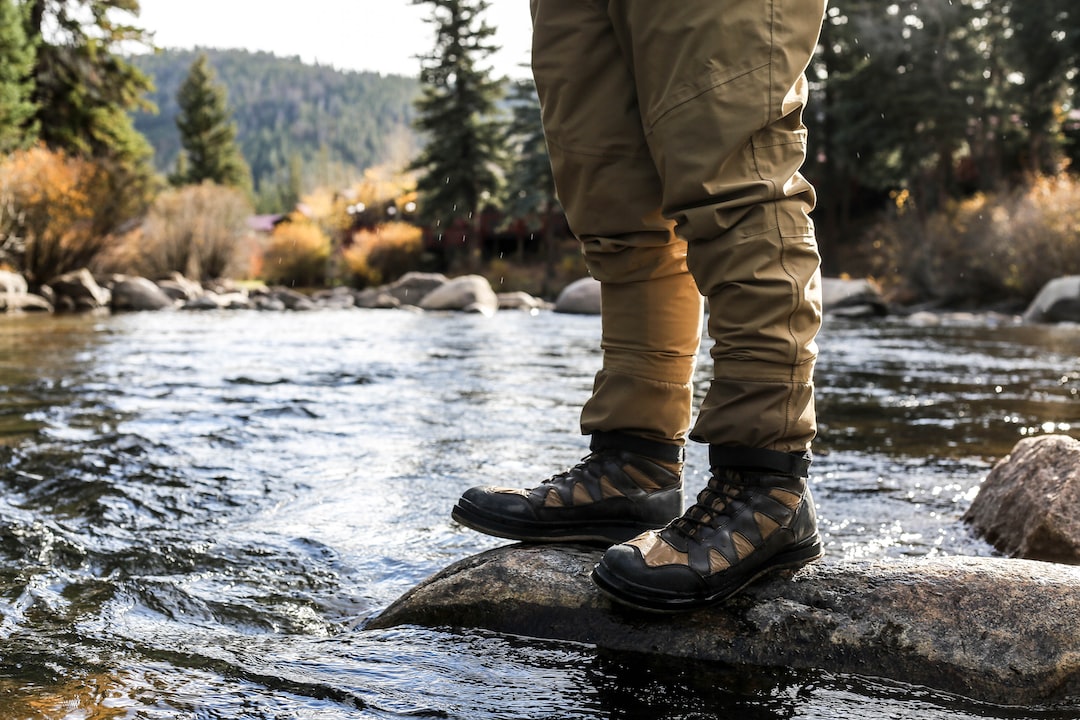
The shoes you wear on your hike have a direct impact on blister formation. The wrong shoes can put unnecessary stress on your feet and create friction, leading to blisters. Make sure to choose hiking shoes or boots that fit well, offer the right support, and are suitable for the terrain you plan to explore. It’s also helpful to break in your footwear before hitting the trail.
Invest in High-Quality Hiking Socks
Not all socks are created equal. When it comes to hiking, investing in high-quality socks designed for this purpose is crucial. Look for socks that wick moisture away from your skin, made from materials such as merino wool or synthetic blends. Avoid cotton socks, as they retain moisture and can exacerbate blister formation.
Trim and File Your Toenails
Long or jagged toenails can snag on your socks or shoes, increasing friction and the risk of blisters. Make a habit of maintaining neatly trimmed, filed toenails before every hike.
What Can You Carry in Your Hiking Bag to Help Prevent Blisters?
Proper prevention goes beyond just your pre-hike preparations. Making sure your hiking bag contains essentials to aid in blister prevention can save you from a painful experience. Consider packing the following items:
- Extra socks: Keep a dry pair on hand to change into if your feet get wet
- Blister tape, moleskin or adhesive bandages: Applied to friction-prone areas before blisters form can reduce the chances of a blister
- Foot powder or antiperspirant: Helps reduce moisture buildup
- Lubricant or petroleum jelly: Can be applied to hot spots to reduce friction
Keep Your Feet Dry and Protected
Maintaining dry, healthy feet throughout your hike can help prevent blisters. When your feet and socks get wet, friction increases, making your feet more susceptible to blister-causing irritants. To keep your feet dry, follow these tips:
Choose Breathable Footwear
Opt for hiking shoes or boots with breathable materials like mesh panels or vented openings. These features enable air circulation, wicking away moisture, and reducing the likelihood of blisters.
Change Socks Regularly
To prevent excess moisture, change your socks as needed throughout your hike. If you notice your feet getting damp, stop and swap your socks for a dry pair. It’s a small step that can make a big difference in your overall comfort.
Know When to Take a Break and Check Your Feet
Preventing blisters isn’t just about your gear and pre-hike preparation; it’s also about knowing your body and when to take a proactive break. If you start to feel a “hot spot”—the early warning sign of friction and potential blister formation—stop and take a moment to address the issue.
Inspect your feet for any red or irritated areas and take action accordingly. Solutions may involve applying a blister pad, adjusting your shoe laces, or putting on a fresh pair of socks. These simple preventative measures can save you from painful blisters down the line.
Practice Proper Foot Care After Your Hike
Caring for your feet doesn’t stop once you’ve finished your hike. Post-hike care is just as important for preventing blisters and maintaining healthy feet. Follow these steps after your hike:
1. Remove your shoes and socks to air out your feet.
2. Wash your feet with soap and water, ensuring you thoroughly clean between your toes.
3. Dry your feet completely, focusing on moisture-prone areas like between the toes.
4. Apply a moisturizer to keep your skin hydrated.
5. Allow your footwear to dry completely between hikes to prevent odor and bacteria buildup.
6. Inspect your gear for wear and tear, addressing any issues that could contribute to blister formation on future hikes.
By following these tips and tricks, you’ll be well equipped to prevent blisters on your hiking adventures, ensuring you have an enjoyable, pain-free experience on the trail. Remember that prevention is key, and taking a proactive approach to foot care will save you from the discomfort and potential complications of blisters. Enjoy the great outdoors and happy hiking!
Strengthen Your Feet and Improve Your Stride
An essential aspect of preventing blisters while hiking is ensuring your feet are strong and your stride is efficient. Weak foot muscles and an inefficient stride can lead to increased friction, pressure points, and blisters. Adopt the following strategies to improve your foot strength and stride:
Foot Exercises
Incorporate foot-strengthening exercises into your fitness routine to provide better support and reduce stress on your feet. Some effective exercises include:
- Toe raises: Lift your toes off the ground while keeping the rest of the foot flat
- Heel raises: Lift your heels off the floor while keeping your toes on the ground
- Toe curls: Curl your toes under your foot, creating an arch
These exercises will help improve both foot strength and flexibility, which can contribute to a more efficient stride and reduced risk of blisters.
Stretch and Warm-up Your Feet Before Hiking
A proper warm-up and stretch routine before hitting the trail can help minimize foot discomfort and promote better circulation. Target your foot muscles, ankles, and calves with dynamic stretches such as ankle rolls, heel-to-toe rocking, and calf raises.
Analyze and Improve Your Hiking Stride
An inefficient hiking stride can lead to increased friction, causing blisters. To improve your stride, consider the following:
- Hike with a natural gait and avoid over-striding or dragging your feet
- Land softly on your midfoot or heel, transitioning smoothly to the ball of your foot
- Maintain proper posture, engaging your core muscles and keeping your back straight
- Use trekking poles to help distribute weight, maintain balance, and reduce impact on joints and feet
Customize Your Footwear for Better Fit and Support
Personalizing your hiking footwear can go a long way toward preventing blisters. Consider making the following adjustments to optimize your shoes or boots for your unique feet:
Choose the Right Insoles
Many hikers opt to replace their shoe’s standard insole with a specialized, third-party option tailored to their arch type and foot shape. These aftermarket insoles can provide enhanced support, comfort, and shock absorption, further reducing the risk of blisters.
Experiment with Lacing Techniques
Sometimes, a simple tweak to how you lace your shoes can help alleviate pressure points and improve overall fit. Various lacing methods cater to different issues, such as:
- Heel lock: prevents your heel from slipping and reduces friction in the shoe
- Window lacing: offers relief from a specific pressure point
- Toe-relief lacing: provides more room for the toes, alleviating pressure on the toenails
Experiment with these techniques to find the most comfortable and secure fit for your individual needs.
Listen to Your Feet: What to Do If a Blister Forms
Despite your best efforts, blisters can still form. If you end up with a painful blister while hiking, proper treatment and care become crucial. First, clean the affected area with soap and water or an alcohol wipe. Next, apply an antibacterial ointment, followed by a blister pad, bandage or moleskin. Finally, adjust your footwear to reduce pressure and friction on the blistered area.
If the blister is particularly painful or large, consider draining it with a sterilized needle. Puncture the blister at its lowest point, then gently push the fluid out. Clean and dress the area as previously described.
Remember that dealing with existing blisters responsibly is just as important as avoiding them in the first place. Proper care can minimize discomfort, prevent infection, and ensure you don’t have to cut your hike short due to painful blisters.
By incorporating these tips and tricks into your hiking routine, you’ll be better prepared to avoid blisters and enjoy your outdoor adventures to the fullest. Keep in mind that it’s essential to consistently assess your feet and gear to ensure optimal hiking comfort. Happy trails!

