
In this comprehensive guide, I’ll share my personal and practical insights on navigating the iconic Angels Landing hike. As a unique and exhilarating experience, it requires an understanding of the hike’s timeline and helpful tips to ensure you make the most of your adventure. In the sections ahead, I will divulge my recommendations on when to hike, how to dress, the optimal trail conditions, and more.
The Angels Landing hike typically takes 4-5 hours round trip, covers 5.4 miles, and requires good physical fitness. Top tips include starting early, wearing proper shoes and clothes, carrying enough water, using the chains for support, and avoiding the hike in extreme weather conditions or if you have a fear of heights.
Why Should I Choose the Angels Landing Hike?
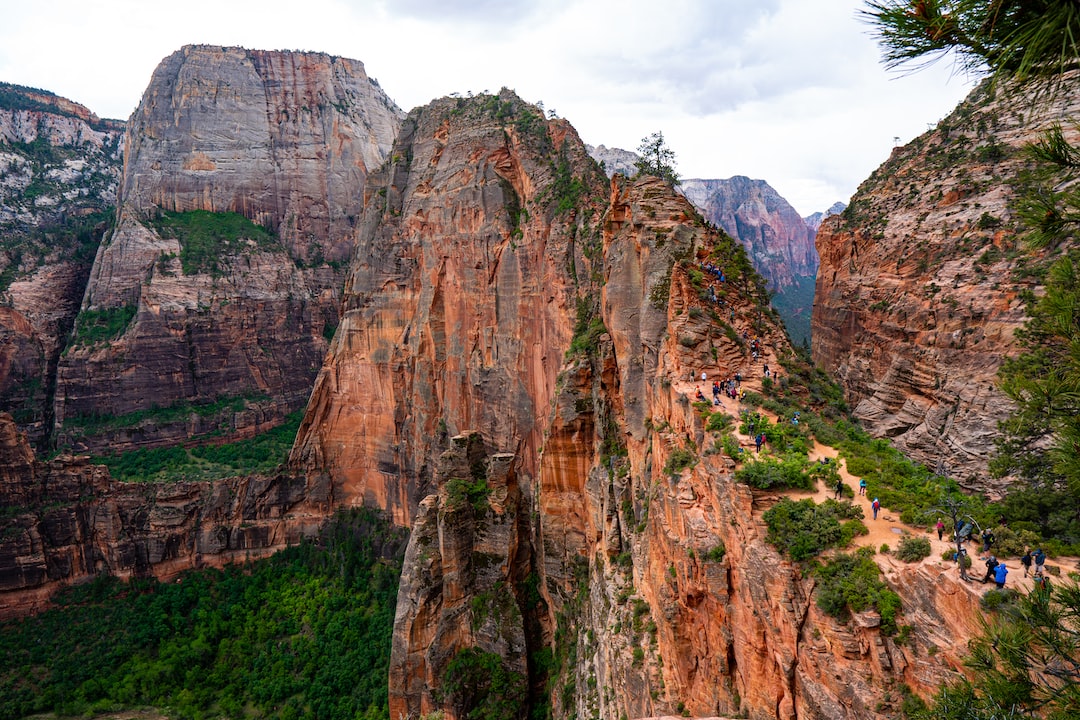
Angels Landing is a majestic hike located within Zion National Park, Utah. This 5-mile round trip trail demands physical endurance, as it ascends over 1,500 feet through a series of steep switchbacks and narrow, exposed ridges. Unlike many hikes you may have embarked on in the past, Angels Landing’s challenge lies within its summit’s height and the ever-narrowing precipices.
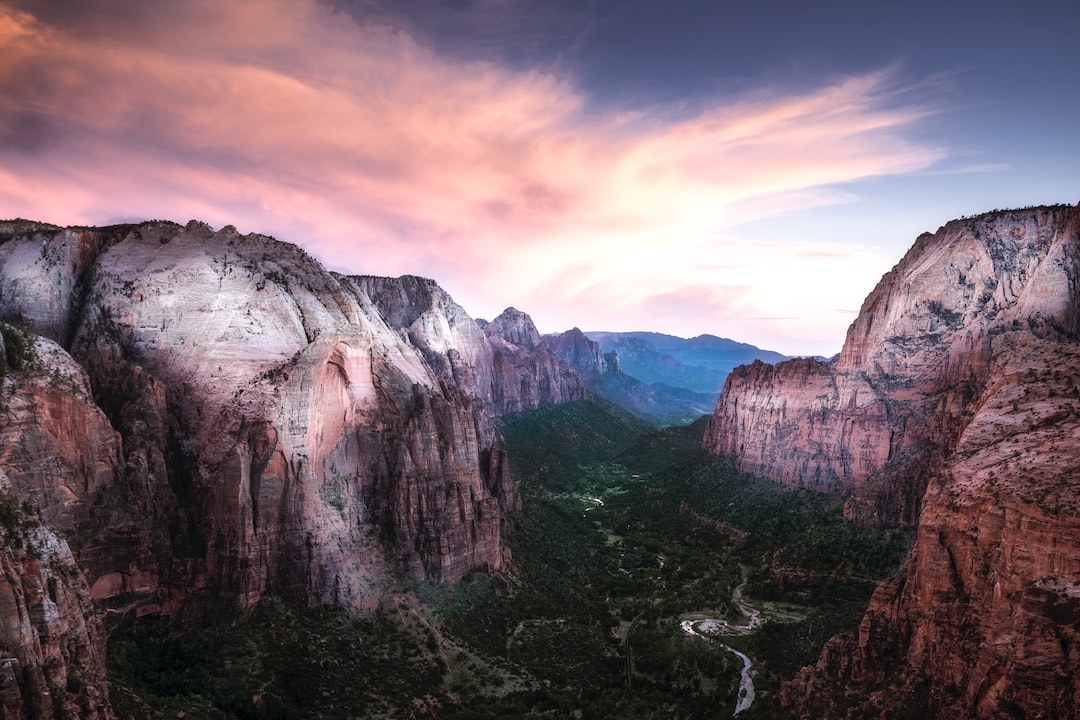
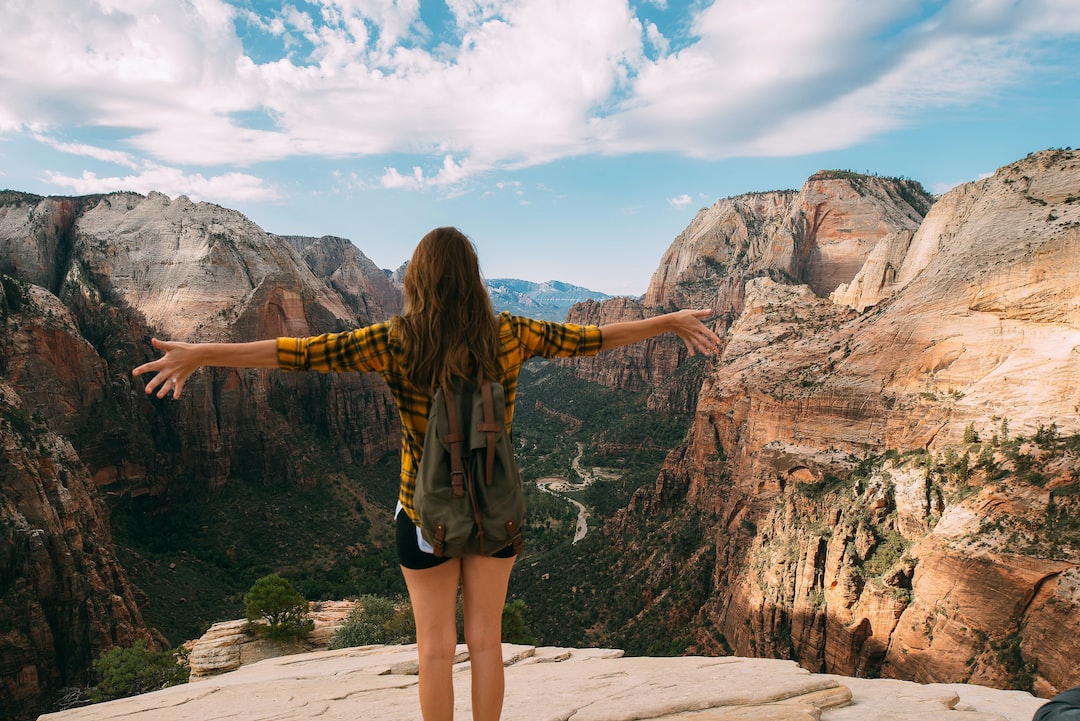
As someone who has completed the hike, in my experience, the view from the summit is an incomparable reward. The breathtaking panoramas of Zion Canyon, the Virgin River, and surrounding peaks will leave you awe-struck. If you’re looking to feel an adrenaline rush coupled with immense satisfaction upon completion, then Angels Landing is the perfect choice for seasoned hikers and thrill-seekers alike.
What Is the Best Time of Day to Hike Angels Landing?
Timing plays a significant role in your Angels Landing hike, and there are multiple factors to consider. The hike may take up to 4-6 hours, depending on your pace and fitness level. It is crucial to allot adequate time for the hike and ensure that daylight will not be an issue.

Early Morning
In my experience, an early morning hike provides the best conditions for the trail. The cooler temperatures make it easier to traverse the zigzagging switchbacks, specifically Walter’s Wiggles – a series of 21 steep switchbacks that lead you towards the final ascent of the route. It’s also an opportunity to avoid large crowds and delight in a serene, tranquil atmosphere atop the summit.
Moreover, if you commence your hike roughly 1-2 hours before sunrise, the entire trail is illuminated by the golden hues of the sun, creating a spectacular visual experience. Be sure to carry a headlamp or flashlight if you plan to hike in pre-dawn hours.
Midday
Generally speaking, I would recommend avoiding a midday hike if possible. The scorching sun can make the already-demanding hike even more exhausting. Additionally, the trail becomes immensely crowded, leading to long queues along the narrowest portions of the route, hindering your pace.
Late Afternoon or Evening
If early mornings are not feasible, the late afternoon or early evening is your next best option. As the sun starts to set, you’ll experience cooler temperatures and lesser crowds. While sunset views from Angels Landing are extraordinary, ensure you have enough daylight to return safely. A headlamp or flashlight will assist in navigating the descent during twilight hours.
Preparing for the Angels Landing Hike
To ensure an enjoyable and safe hike, adequate preparation is essential. Here are a few tips to help you get started:
Attire and Gear
Proper attire is essential to ensure safety throughout the hike. Outfit yourself in moisture-wicking and breathable material to remain comfortable during physical exertion. Opt for sturdy and ankle-supporting hiking boots with good grip, as some sections can be slippery.
Additionally, a refillable water bottle or hydration pack with at least 2-3 liters of water is crucial, as dehydration can exacerbate fatigue. Don’t forget to pack and apply sunscreen and wear a hat to protect your skin from the sun.
A pair of sturdy gloves can offer support and protection during the chained sections of the trail. Although not necessary, trekking poles can help navigate the initial switchbacks.
Fitness
This hike isn’t for the faint-hearted. A reasonable level of fitness is required to enjoyably maneuver the strenuous switchbacks and narrow, exposed sections. Preparing for the hike with conditioning exercises, such as outdoor walks, stair climbing, or indoor stair machines, will enhance your stamina and leg strength.
Understanding and Navigating the Trail
The Angels Landing hike consists of several distinct sections. Familiarizing yourself with these will help you mentally prepare and navigate the trail with confidence.
1. Grotto Trailhead: The starting point of the hike is the Grotto Trailhead. During peak season, utilize the park’s shuttle system to reach this point.
2. West Rim Trail: The West Rim Trail takes you through gentle switchbacks, eventually progressing to the steeper Refrigerator Canyon. Don’t forget to pause and enjoy the lush scenery that surrounds you.
3. Walter’s Wiggles: This segment consists of 21 steep and challenging switchbacks that require diligent effort. Pace yourself and take breaks if needed.
4. Scout Lookout: A critical juncture, Scout Lookout presents the decision to either proceed to the summit or rest and return. If you fear heights, have fatigue, or adverse weather conditions are present, it’s safer to enjoy the view from Scout Lookout and not attempt the summit.
5. Hogsback: The ridgeline that leads to the final summit ascent becomes increasingly narrow and exposed. You’ll encounter chains for support and security in this area, and it’s essential to remain cautious and focused.
6. Angels Landing Summit: Upon reaching the pinnacle, embrace the moment of triumph and marvel at the breathtaking views surrounding you.
Angels Landing Hike Safety
While engaging in this thrilling adventure, prioritize safety at all times. Some best practices include:
1. Check the weather forecast: Avoid hiking in heavy rain, snow, or ice, as the trail becomes increasingly dangerous.
2. Be vigilant: Focus on your trail and maintain a constant awareness of your footing to prevent any mishaps.
3. Use the chains: Utilize the support provided by the chains in the final ascent, having gloves can help maintain a secure grip.
4. Stay on the trail: Do not deviate from the established path, even if it appears crowded.
5. Know your limits: Retreat if any section becomes too difficult or uncomfortable. The hike is more enjoyable when you prioritize your well-being.
With the proper preparation, timing, and mindfulness, you’ll undoubtedly cherish your Angels Landing hike for a lifetime. Remember to soak in the magnificent views, stay safe, and appreciate the unforgettable adventure that awaits you atop the summit.
Group Hiking and Solo Hiking on Angels Landing
When considering the nature of your Angels Landing hike, it’s important to weigh the benefits of both group and solo hiking. Each choice presents unique advantages and potential drawbacks.
Group Hiking
Hiking with companions provides a sense of security and camaraderie. Sharing the experience with others can enhance the adventurous aspect of the hike and create lasting memories. Additionally, friends can assist in motivating one another during the more strenuous sections of the trail, such as Walter’s Wiggles.
It’s essential, however, to maintain a reasonable group size to avoid contributing to the trail congestion. Additionally, it’s crucial to ensure all group members are physically fit and prepared to undertake the challenge.
Solo Hiking
Embarking on the Angels Landing hike alone allows for freedom from external pressures and pacing. You can determine your own break times and choose the moments to pause and appreciate the scenery. Plus, solo hiking can be an empowering and fulfilling experience.
While solo hiking, it’s vital to uphold personal safety practices, remain on the trail, and communicate your plans to others ahead of time. This is especially important when hiking during off-peak hours or in changing weather conditions.
Managing Expectations and Overcoming Fears
Expectations can sometimes create unnecessary stress or anxiety while embarking on a challenging hike like Angels Landing. It’s important to be honest with oneself about the potential difficulties and personal limitations.
Keep in mind that not everyone will complete the entire trail. Reach Scout Lookout and gauge your comfort levels. If the chains section appears too daunting or you’re experiencing heightened anxiety, remember that the views from Scout Lookout are still remarkable.
Take deep breaths and focus on present sensations when confronted with fear or anxiety. Breaking the trail into smaller sections can make it more manageable mentally. Don’t be afraid to step aside and allow other hikers to pass if you need a moment to collect yourself.
Photography Opportunities and Etiquette
The Angels Landing hike provides innumerable photography opportunities to capture the beauty of Zion National Park. From the changing hues of the sunrise to the expansive canyon vistas at the summit, the trail is a photographer’s dream.
Be respectful of fellow hikers when pausing to snap photos. Allow others to pass before setting up a tripod, and avoid obstructing the path or holding up other hikers when attempting to get the perfect shot.
Having a secure camera strap, a small daypack or belt clip to stow your camera when not in use, and extra batteries or charging capabilities can enhance the photography experience on this trail.
In conclusion, conquering the epic journey of Angels Landing demands proper planning and execution, from timing and attire to trail etiquette and safety precautions. By following the outlined tips, you’ll secure a gratifying and memorable hiking adventure that complements Zion National Park’s incredible landscape. Embrace the trail, stay safe, and cherish your unique experience atop the summit. Happy hiking!


